Get weekly
HubSpot updates
If you’re spending money on advertising on Facebook then the one audience you can’t afford to ignore is your website visitors. This is an audience of extremely relevant people who know your brand, know what you’re all about already and have likely been looking at your product or services so are primed for remarketing.
How to Create A Website Custom Audience
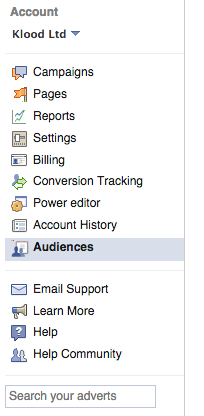
Select the ‘Audiences’ tab in the left hand menu of the Adverts Manager
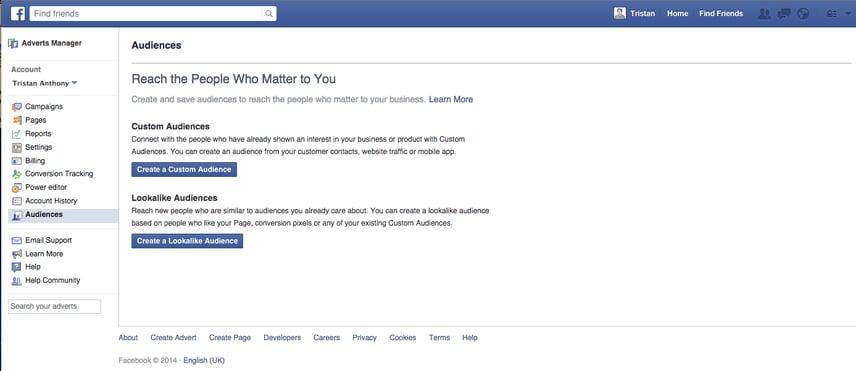
If you’ve never set up an Audience in Facebook before then you’ll be presented with the below screen. Click on ‘Create a Custom Audience’.
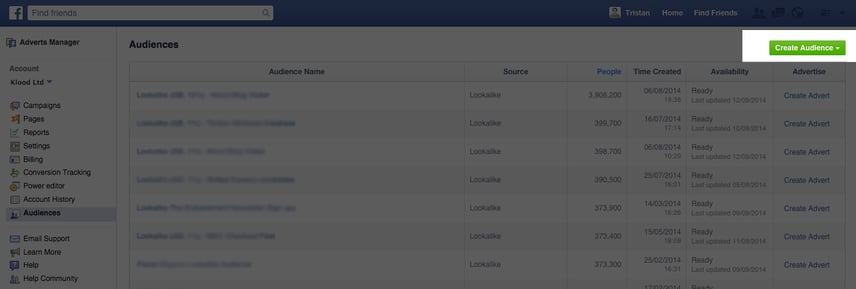
If you have set up other Audiences before, such as from your email database, then it will take you to your Audience dashboard. To then create a Website Custom Audience click on the green Create Audience button towards the top right corner and then ‘Custom Audience’.
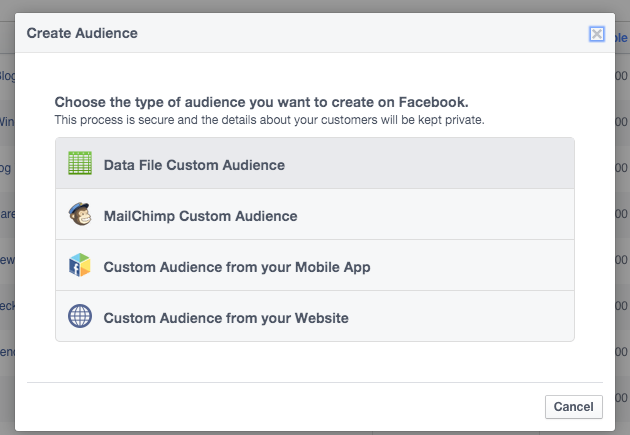
In the pop up window, select ‘Custom Audience from your Website’.
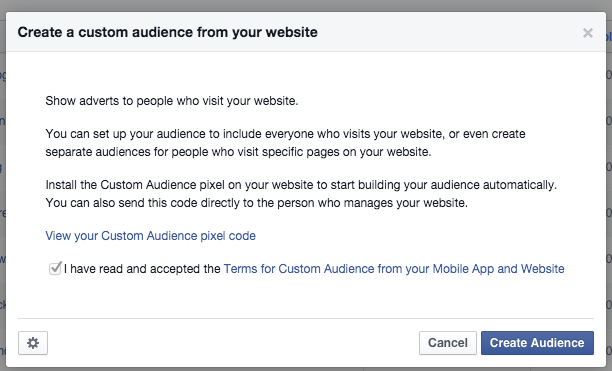
Read the terms and conditions and click ‘Create Audience’ when you’re ready
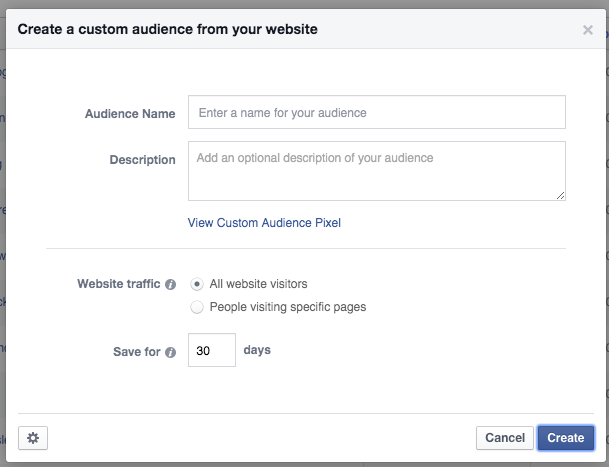
Enter a name for the Audience such as ‘Website Visitors’ and any additional or specific information in the description section (though this section is not required).
If you just want to start advertising to everyone who visits your site then leave the ‘All website visitors’ option checked.
If you want to segment your website visitors, so that you’re advertising to your blog visitors or those who have viewed specific products or services pages, for example, then select the ‘People visiting specific pages’ option.
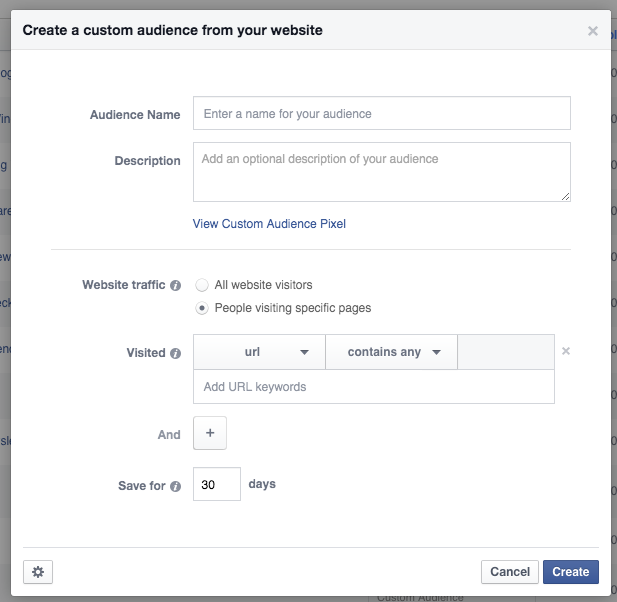
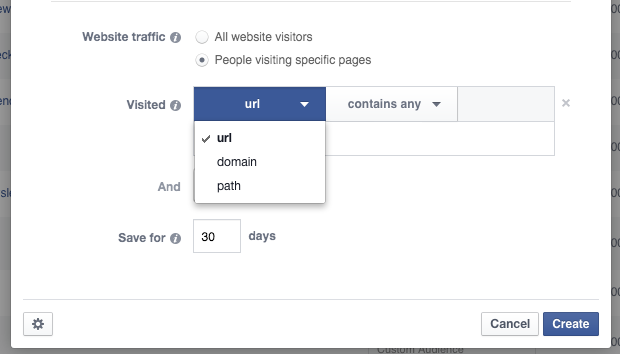
You’ll then have various options to filter the audience by ‘url’, ‘domain’ or ‘path’.
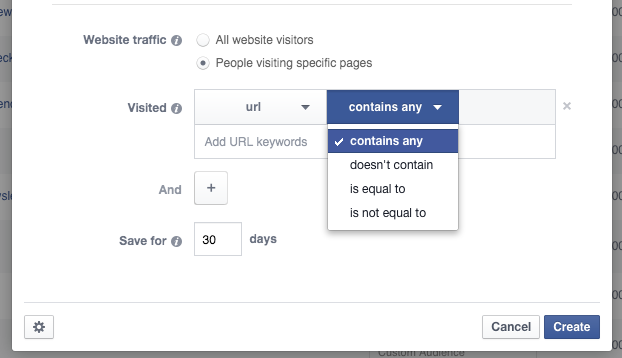
And then filter by ‘contains any’, ‘doesn’t contain’, ‘is equal to’ and ‘is not equal to’.
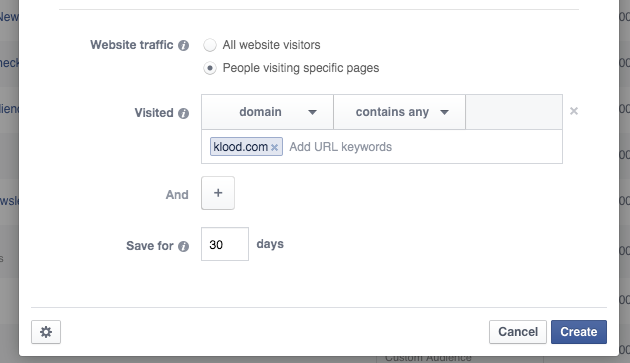
You’re able to enter in a variety of entire url’s, domains, paths or just keywords within the domains so there are a lot of options available to you to filter down the audience to a niche group if you so wish.
Finally, the ‘Save for... days’ option will depend on the volume of traffic you receive to your site. This option will tell Facebook how many days after a person visits your site it will keep them in your Audience for. The higher your volume of traffic the lower you can keep this number and therefore ensure you’re always hitting hot leads. However for smaller businesses or sites with lower levels of traffic you will want to set this number higher so that you have a larger group of users to advertise to. You can set this from anywhere between 1 and 180 days.
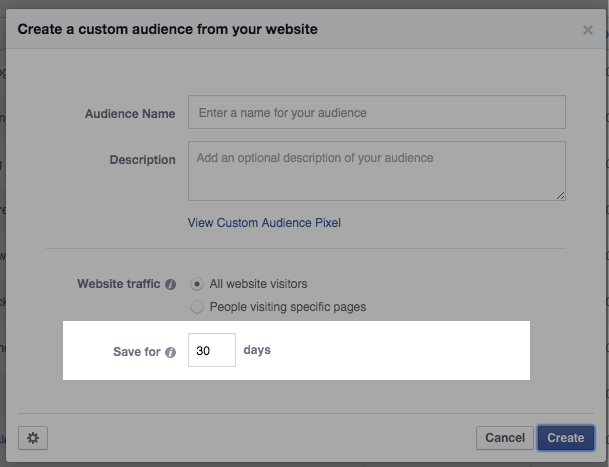
Before, you click ‘Create’ click ‘View Custom Audience Pixel’.
![]()
This will generate your pixel for you. You now just need to copy and paste this piece of code and either:
- Send to your website developer with the instruction to insert between the <head> and </head> tag in your website code
- If you’re a bit more web savvy and confident with your coding skills then you can manually do this yourself

Ta da! You’re all set up and ready to run adverts to your website visitors.
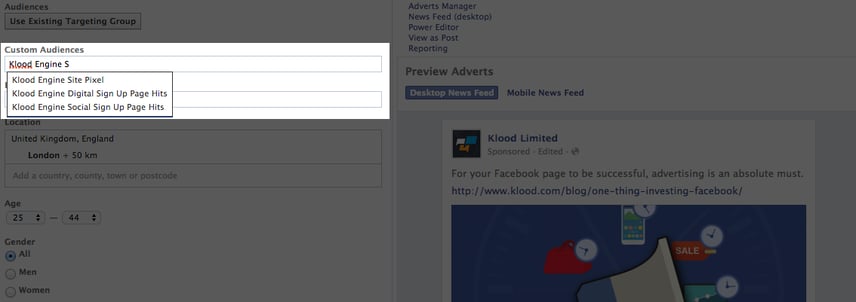
How do you now use this Audience I hear you ask? Well, in the Power Editor when you’re deciding on your targeting options in the ‘Audience’ tab simply start to enter the name of your Custom Audience into the ‘Custom Audiences’ field and it should appear in a list of options for you to select.
However, you won’t be able to run adverts to the audience until the pixel is successfully installed and verified as working by Facebook and the Audience has a minimum of 20 people in it.
Happy advertising!
