
Get weekly
HubSpot updates
If you use Google Analytics (GA) then it’s probably time to start taking advantage of the many benefits Google Tag Manager (GTM) has to offer.
GTM is Google’s free-to-use tag management system that, conveniently, also integrates the company’s other digital tools, such as AdWords, DoubleClick and Trusted Stores. We’ve been eulogising, both internally and to clients, about the benefits of having a tag management system (and in particular GTM) for a while now, so I wanted to share an introductory guide for those of you who aren’t familiar with the system.What is a tag management system?
Simply put, tags are snippets of code that sit within either the <head> or <body> elements of a web page which enable tracking, analysis and reporting.
Tag management software is a way for marketers and developers to apply these snippets of code to their website via a user-friendly interface, meaning you don’t have to ask your web developer to do it for you.
Tag management systems enable several tags, including for third-party properties such as AdRoll, to be inserted into one all-encompassing container. Where previously you had several code snippets, these are replaced by the tag management code.
What does Google Tag Manager allow me to do?
GTM enables webmasters to give specific permissions to certain users so that they can access different sections of the system. For marketers, it allows them to decide when tags should be ‘fired’, dependent on certain conditions (triggers) defined by the user.
For example, if you’re using Google Analytics you would usually wish to fire the tag on all pages across your website because you’ll want to be able to analyse traffic data for all of your pages. You may also wish to set up event tracking within Analytics, such as external link clicks or form submissions. You can tailor your events to only record when the appropriate triggers are met.
What are the benefits of a tag management system
If you’re not a web developer, the idea of delving into your website’s HTML and playing with the code might seem like a very daunting prospect indeed.
Tag management allows you to implement tracking and analysis code snippets easily onto your website, without having to worry about possessing coding skills or bothering your IT guy. All you need to do is add the tag into your management dashboard and it will appear on the pages you designate.
By using this process you can improve the efficiency of your organisation and rely a lot less on your developer, instead making website changes yourself (there is a small caveat to this, but more on that later).
Additionally, event tracking within Google Analytics was only previously possible with the help of a webmaster or developer, but with the help of GTM marketers can take control over this process.
What is Google Tag Manager’s Structure/Hierarchy?
GTM’s structure has accounts at the highest level, and containers within those accounts. You then set up tags, triggers (formerly known as rules) and variables (formerly known as macros) within each of those containers. GTM’s hierarchical structure is shown below:
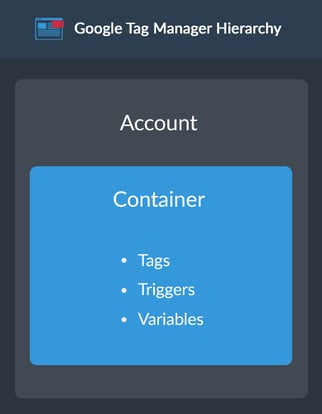
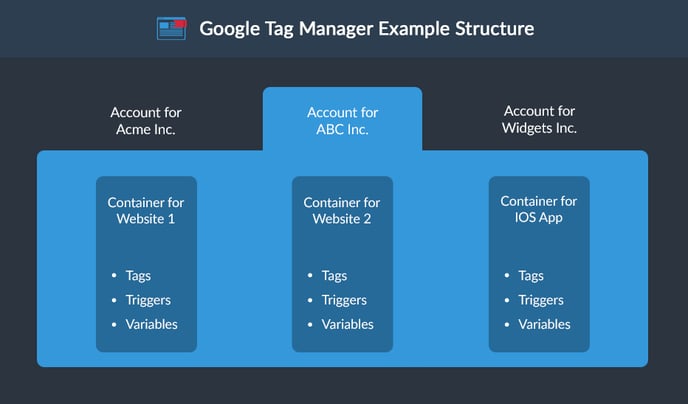
Accounts can include a company or organisation, with lots of websites (such as a restaurant chain with different websites for each restaurant), or a small local company (like a local store) with only one site. Containers hold all the tags relating to one website or mobile application. For the purposes of this Google Tag Manager guide, we’ll focus on one website installation, but you can see an example GTM account structure below:
Now we understand what GTM is and what the benefits are, let's crack on with this tutorial.
How can I set up Google Tag Manager on my website
Firstly, head over to Google Tag Manager and sign in at the top right hand corner.
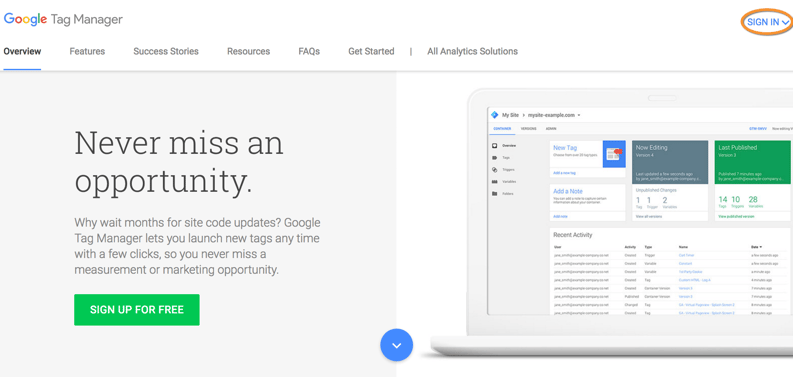
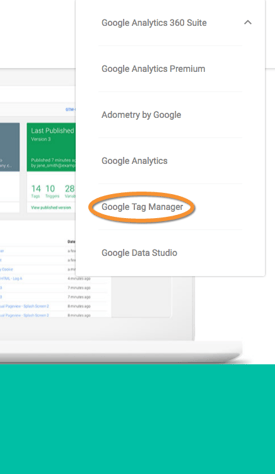
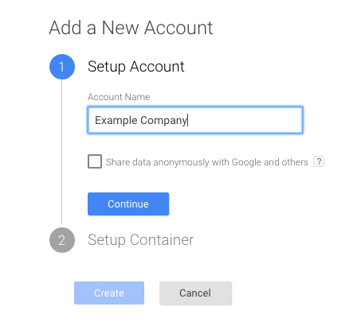
If it’s the first time you’re signing up with your email address, follow the instructions and enter your account name (usually the name of your organisation):
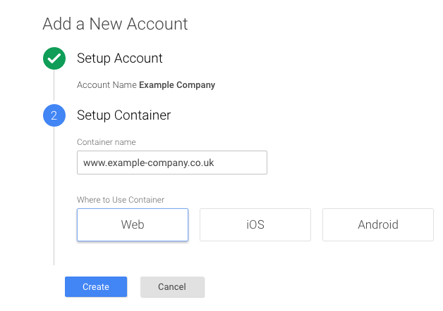
You then enter your domain name into the ‘Container name’ field and choose where to use your container - on the desktop version of the website, on iOS and/or Android:
Click ‘Create’ and you’ll be presented with a screen asking you to add the container code onto every page of your website, as well as the code itself:
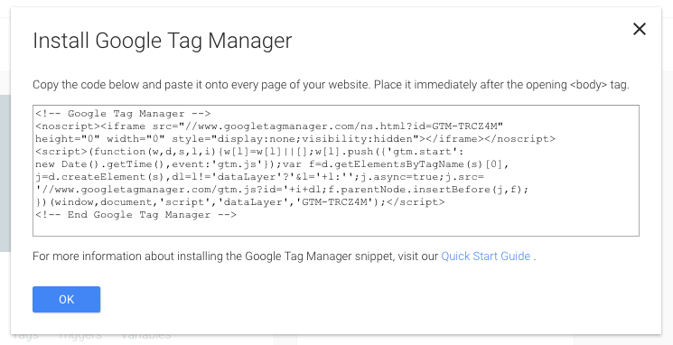
This code can be added in using your content management system (CMS) by editing one of the template files. Make sure the GTM code snippet is inserted immediately after the opening <body> tag, and that any old instances of Google Analytics codes are removed to avoid double counting users.
This stage should be the only time when you might require the help of a developer or webmaster. This might not always be the case, as you may need assistance tackling ID or class issues relating to event tracking.
Adding your first tag
Now that you’ve added the container tag to your web pages, it’s time to create your first tag, and this will typically be the Google Analytics snippet.
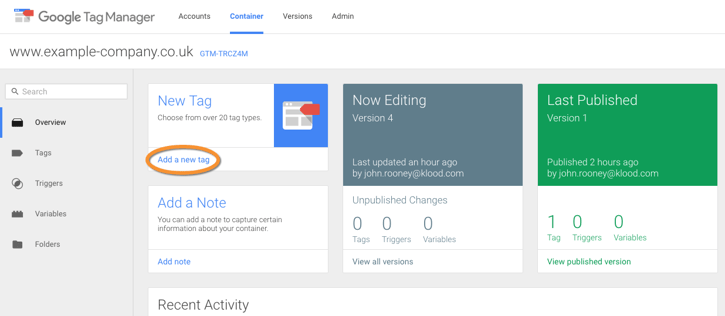
From the GTM dashboard, click on ‘Add a new tag’:
You then have to select which property you wish to create a tag for. For this example we want to select Google Analytics:
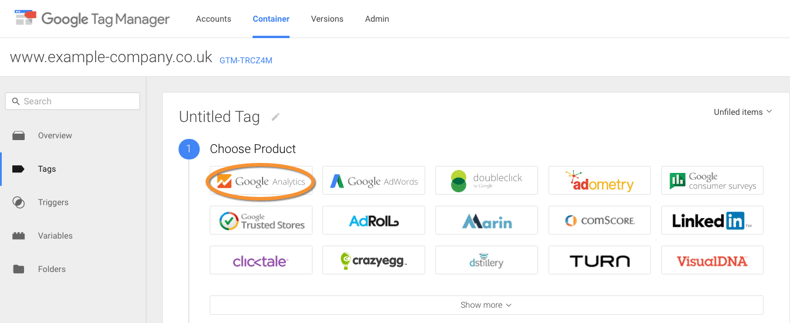
After choosing Google Analytics you will need to name your tag - something simple like ‘Google Analytics’ will suffice - however naming conventions are quite important should you start to implement more complex installations later down the line. You can refer to Google’s help documentation to help you determine your own architecture. You should then choose a tag type:
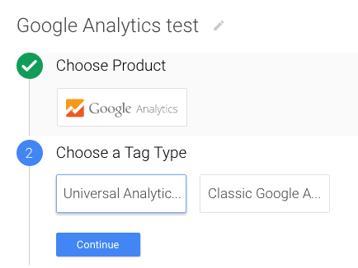
‘Universal Analytics’ (UA) is chosen by default, but depending on the version of GA you use, you may need to select ‘Classic Google Analytics’. However, you should probably see this as an opportunity to upgrade to UA to take advantage of the benefits of doing so.
You will then need to enter your GA tracking ID, which can be found by going to your Analytics dashboard.
![]()
Copy and paste the tracking ID into the field below:
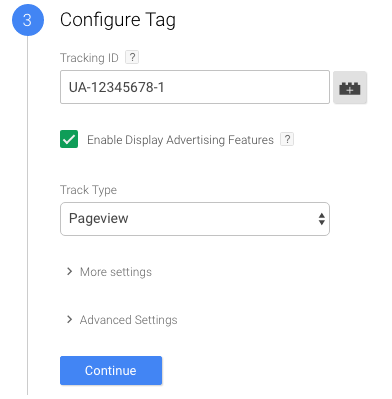
You can also set up your own variable within GTM that dynamically pulls in the GA property ID into your container, to save you the hassle of copying and pasting the code each time.
In the above image, you can see the dropdown selector “Track Type”. The ‘Track Type’ will be Pageview by default, but you can leave this as it is. I’d also strongly recommend ticking ‘Enable Display Advertising Features’ to start pulling in demographic data into Analytics, but this does impact on your Privacy Policy, so make sure yours is up to date before enabling this feature.
You shouldn’t need to access any of the advanced features at this time, but you will have to set a firing trigger.
Firing triggers detail when the tag will become live and in this case, you should set the tag to fire on all pages because you want GA to be tracking on every page on your site:

By clicking on ‘Create Tag’ you will save it, but it won’t be live yet.
Preview Mode
It’s very important to preview your tags before setting them live to see if they are firing when they’re supposed to.

When preview mode is enabled, you should see the below in your GTM dashboard:
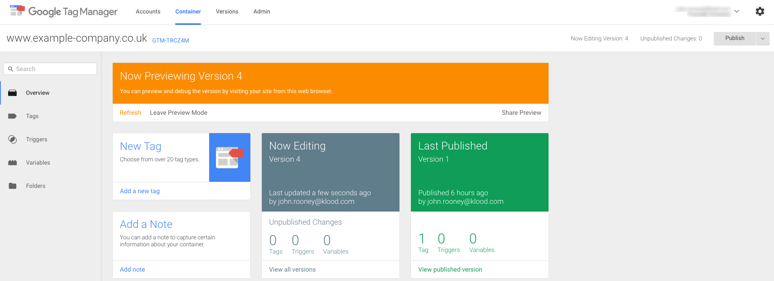
In order to use preview mode, visit the URL of your website, and you should see a pane at the bottom of your browser window:

Publishing your Container
Once you know that all your tags are firing, all you need to do is click publish. To double check that it’s working first, head over to the Real-Time report in GA to check that your visits are being recorded. Unless you have your IP filtered out of the view you are reviewing, you should see live statistics of what page you’re looking at. If you make any changes in GTM, you will need to refresh preview mode in order to see them on the site, so please bear that in mind.
Once you’re satisfied your Google Analytics tag is firing correctly, click the Publish button on your GTM console.
Fortunately, GTM includes version control to ensure you can’t accidently overwrite your tags, allowing you to return to a previous version if you do make any errors.

Editor's note: This post was originally published in October 2014, and has been updated to reflect Google Tag Manager Version 2.

