
Get weekly
HubSpot updates
WordPress is commonly seen as the most widely used content management system (CMS) on the planet. WordPress was originally a “publishing platform” that was focused towards writers and bloggers. Out of the box, the CMS is pretty SEO friendly, but it’s not the only thing you need to perform well on search engines. Infact, just implementing a few changes on WordPress won’t get you to the top of the search engine results pages (SERPs) overnight. However, there are several things you can do to your blogs that may assist your website's search rankings. The aim of this article is to hopefully educate those who are relatively familiar with the CMS, so that when your blogs go live, they are as “optimised” as much as they possibly can be.
For a long time, blogging has played a crucial role in any online marketing strategy. If you don’t have a blog on your website, you really should think about implementing one. Infact, it’s the one piece of advice I give to every small-medium sized business with little-to-no marketing budget. Marketers have long eulogised that blogs are an important way to spread information, show your expertise and reach new customers.
The reason for this is threefold;
- It’s an ideal communication channel between you and your current or potential consumers, giving you the opportunity to educate, entertain and inform them in an engaging manner.
- It’s great for SEO - the process of improving your website's rankings on search engines such as Google and Bing.
- It’s relatively, inexpensive.
Writing the blog is just the start though. As mentioned above, writing regular, engaging content is great for optimising your website for search engines because fresh content is favoured. Why? Because regular content uploads means search engines may start crawling your site more often, which in turn means they discover more content, and more keywords. It provides another page on your website for you to say “hey, my website is about these particular keyphrases or topics”, whilst potentially earning valuable backlinks to your site which can in turn boost search rankings, for not only the post you’ve written, but also for the website as a whole.
However, you should consider that just writing an article is not enough - it’s important to optimise the blog to ensure it ranks as well as it can in search engines. The purpose of this article is to help guide you when uploading your blog to WordPress.
In order to get the most out of this post, you’ll need;
- a self-hosted WordPress site
- the Yoast SEO plugin installed (if you’re not sure how to install this plugin, check out Yoast’s installation guide)
N.B. You may notice some of the screenshots look a bit different to your WordPress installation - this is nothing to worry about, it’s just likely you’re using a different version of WordPress!
Let’s begin
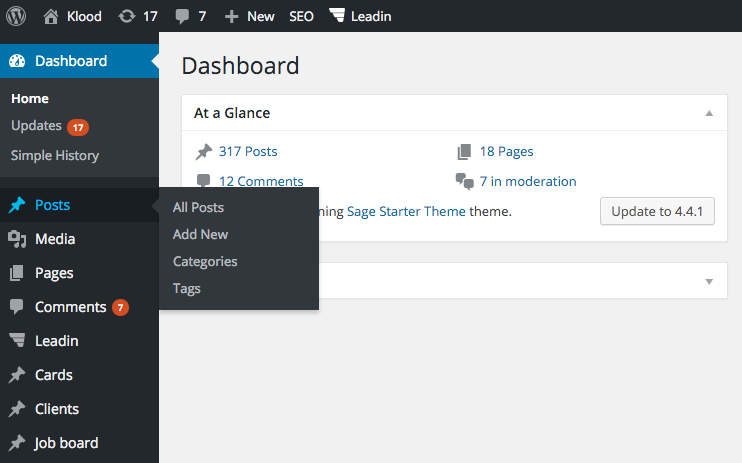
Firstly, you’ll need to login to WordPress and go to “Posts” in the top left corner and click on “add new”. Alternatively, go to "New" at the top of your toolbar and then choose “Post” to add a blog.
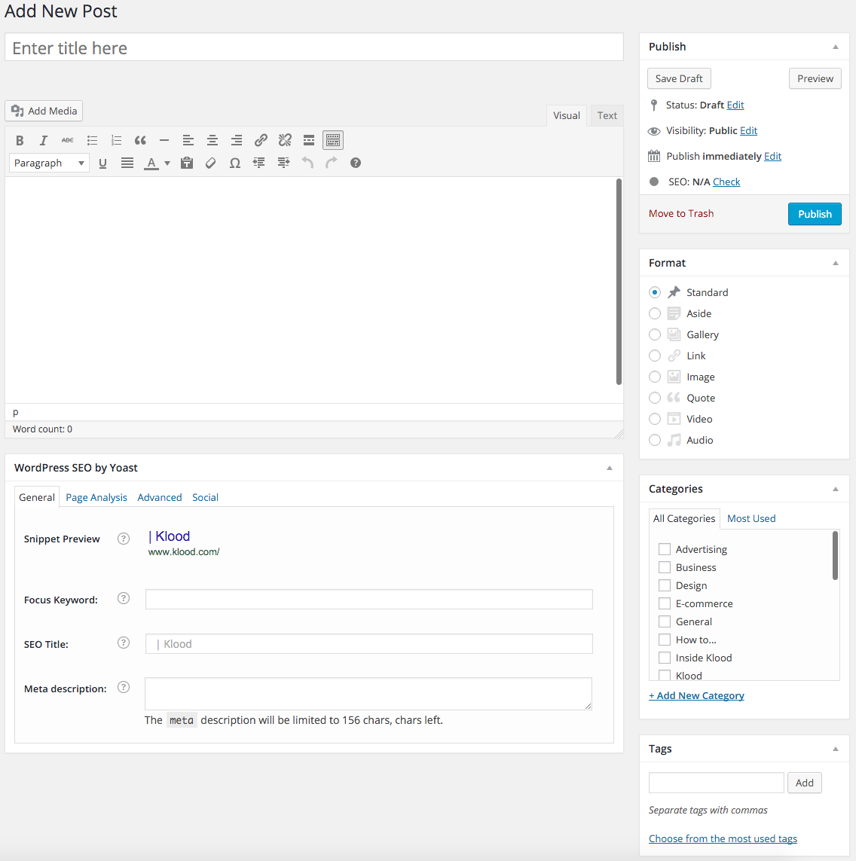
You’ll find the main content area separated into two columns (if you’re on a desktop device)
- The left hand column where you enter your title, URL, copy, images, and SEO information
- The right hand column that contains information such as whether your article has been published or not, the category/tag for your post and sometimes a “Featured image”
Adding content
To add content, it’s vitally important that the first thing you do is add the title of the post. Try to make sure the title of the article contains the keyword or phrase your article is trying to target:

Why? Because when you go to publish the post, or save a draft, it will automatically populate your URL with search engine friendly (SEF) information instead of using numbers:

The next step is to start adding your content. Now it’s important to consider several aspects that can influence your performance in search.
Use appropriate keywords
Firstly, you need to ensure your inserting relevant keywords. Put yourself in the reader’s shoes. What kind of keywords will they be searching for? What problem are they trying to solve? This will help users find your article on search engines. If you need help with selecting your keywords (otherwise known as keyword research), then check out this beginner’s guide from Moz.
Use headings to structure your content
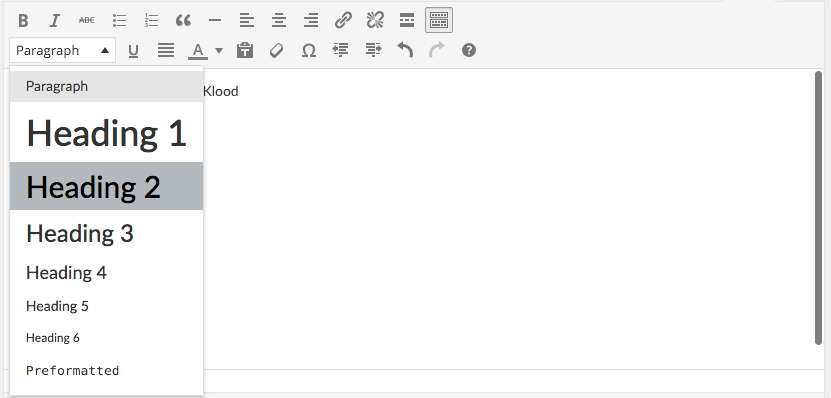
Try to include HTML headings in your blog, think of it like an essay. . Headings should flow naturally. Highlight them and choose "heading 2", "heading 3", or whatever is appropriate. Header tags matter much less than they used to, but still help search engines digest content:
Link internally
I often think this is an underused SEO tactic. The intent here is to try and find two or three phrases that are in the article, that you use to internally link to your other blogs or pages published on your website. The key here is to use what is known as “keyword rich anchor text”. This is where the linking phrase - that points to another page - contains the keywords that the target page is trying to rank for. A good example could be a recruitment company who has an article about job interview tips. Instead of the below:
“Click here to read our job interview tips”
You should use:
“Read our latest article on job interview tips.”
This gives search engines context about the page you’re linking to. I should state that it’s not recommended to over do this tactic. Vary the linking phrase, and feel free to use “find out more” or “click here” now and again, however, by using phrases that don’t have your keywords in, you’re not giving the search engines any “advice” over what the page you’re linking to is about, so use these sparingly.
To add a link in WordPress, highlight the word or phrase that you wish to use to provide the link, click the chain icon in the menu bar above your body copy:

Then either insert a custom URL or link to existing content using the dropdown and search for the article you wish to link to on your own site:
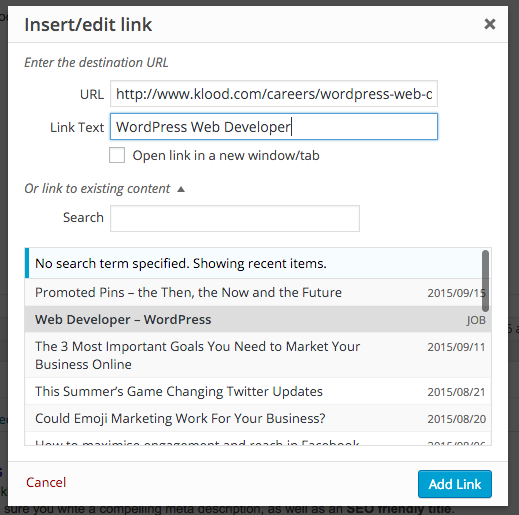
You can then edit the link text as above.
Image Optimisation
I won’t go through the reason why image optimisation is important - I’ll leave that to my colleague. However to briefly recap, when adding images, always make sure the following is optimised:
- The image name
- The image size
- The image alternative (alt) text
- The image title
Search engines can’t “see” images, so the image name, alt text and the image title enables them to understand what that image is about. When you upload an image, you can edit some of this information:
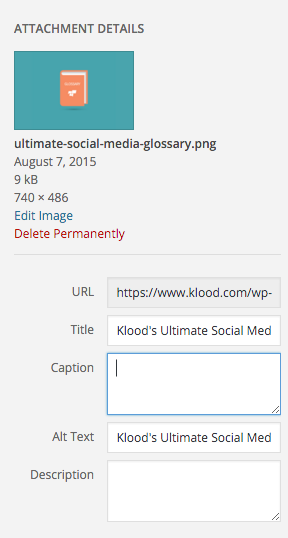
Ensure you use hyphens - not underscores (_) - to separate words in image names, but for alt text and image titles, you can use spaces. Search engines are much better at understanding the difference between underscores and hyphens than they used to be, but it’s best to be on the safe side.
If you’ve uploaded an image and it’s not got a search engine friendly name (ie, it’s called img_217da.jpg), there’s a handy plugin called Media File Renamer which can help correct this.
WordPress SEO by Yoast
Once you’ve inserted your content, you’ll then want to turn your attention to the WordPress SEO by Yoast box underneath your content. If you can’t see this box, click the “Screen Options” button in the top left corner, and ensure that WordPress SEO by Yoast is checked;

You should then see the aforementioned optimisation box underneath your main body content;
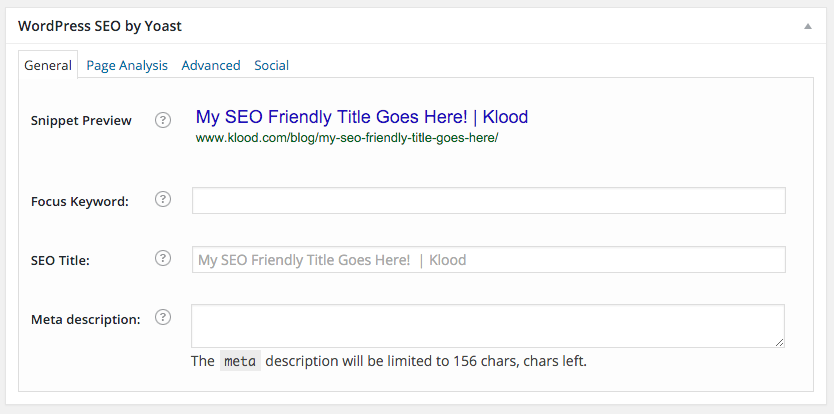
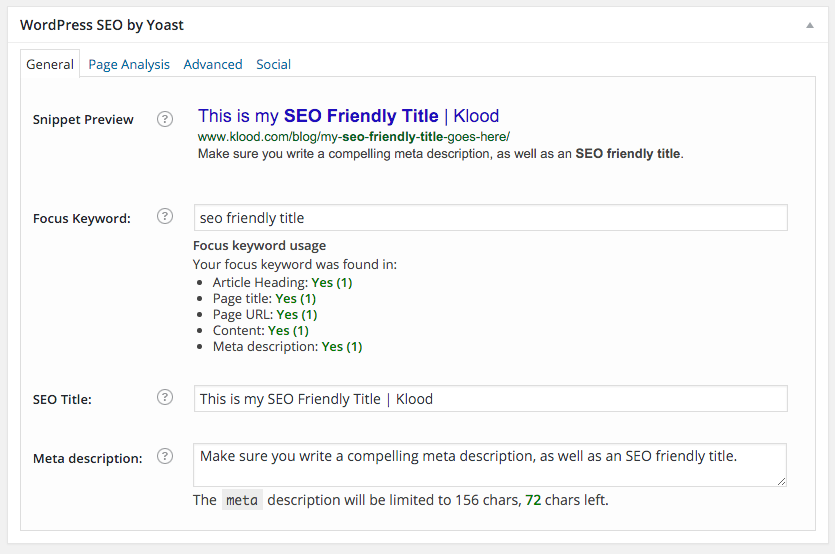
The “snippet preview” is Yoast showing you how Google might display your search results. It’s highly likely that yours will be exactly as the snippet suggest, but Google’s known to edit this information from time to time. However, you should still use this as your guide. The first text entry box is your target or focus keyword or phrase. You could insert this keyphrase in here and Yoast will tell you how well optimised your page is using a traffic light system. I personally tend not to use this, but it certainly helps keep you on track.
The next field is the SEO title (often referred to as the meta title or page title). The meta title is the most important on-page SEO factor - aside from the content itself. This is the blue linking text you see on a search engine results page. You can edit this to how you see fit, but make it count! Try and use the field here to include your keyword or phrase you’re focusing on - but keep it around the 50-55 character mark to ensure your meta title isn’t cut off by Google or the other search engines.
Next up is the meta description. The meta description is the black bit of text that displays underneath your meta title and URL on a search engine results page. This isn’t really a ranking factor in the same way that it used to be - but it’s still important as you have roughly 155 characters to try and convince users to visit your page.
If you’ve done all this effectively, you should see something like the below;
The next thing you’ll want to consider is categorisation and tagging.
Categorisation and tagging
Although not really important for SEO, categories and tags can help users find interesting content on your site. In the right hand column, you can create or tick the categories that relate to your blog. Try not to have more than about 10 categories on your blog though. It can become a bit disorganised and difficult to use if you have many more than 10.
Checking it and publishing
At the end of your article on WordPress, the Yoast SEO plugin gives you a guide on whether your on-page optimisation implementation is effective. If you’re happy with your article, the next thing to do is publish!
You can publish your article immediately, but WordPress offers the possibility to schedule your blogs. In the top right corner, next to “publish immediately”, click on “edit”;
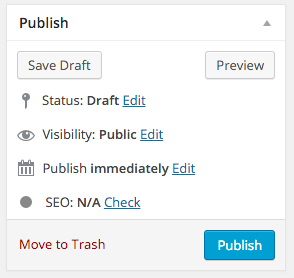
You can then choose your preferred day and time;
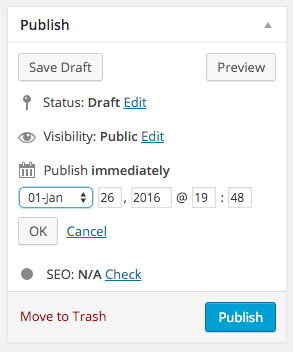
When you’re happy with everything, click on the blue button that will either say “Publish”, or “Schedule”.
This should be everything you need to optimise your WordPress SEO article. There are some additional settings that you could implement using the Yoast plugin - but I’ll save those for another time.

